
How to Fix Headphone Print Damage on Your MP3 Shuffle: A Complete Repair Guide
- Santanu Chaudhury
- Aug 6, 2025
- 9 min read

Updated: Sep 3, 2025
Introduction: Understanding Headphone Print Damage

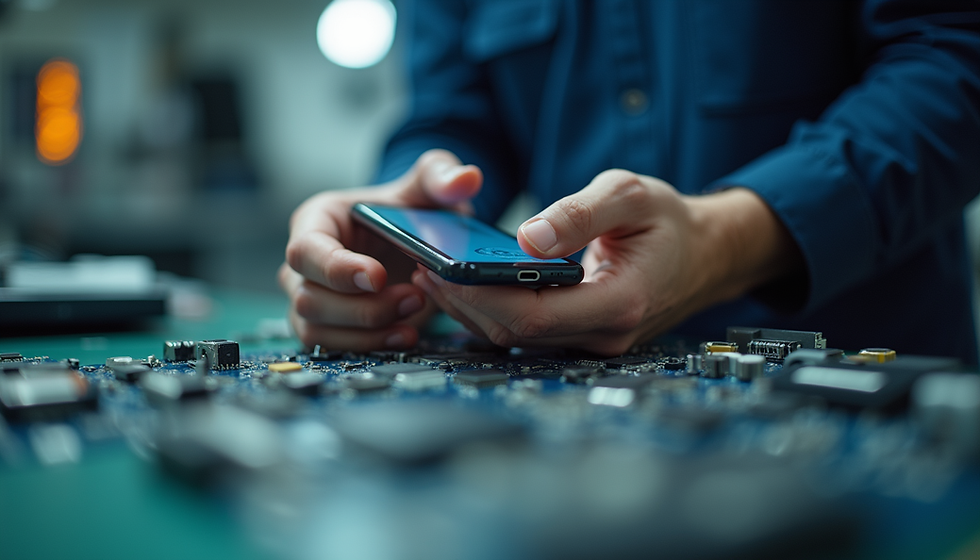
Hello, I'm Santunu, a senior instructor at Techguru Assam, and I've seen countless students come through our doors with devices that have been written off by others. Today, I want to share my expertise on one of the most common yet fixable issues I encounter: headphone print damage on MP3 Shuffle devices.
If you're reading this, chances are your beloved MP3 Shuffle has stopped playing sound through headphones, and you've discovered the frustrating issue of "headphone print damage." This common problem occurs when the copper traces (also called "prints" or "pads") around the headphone jack on the device's circuit board become damaged, corroded, or completely lifted off the board.
In my years of teaching at Techguru Assam, I've developed a systematic approach to repairing this issue that I'm excited to share with you today. These are the exact techniques I teach our students in our advanced mobile and device repair courses.
What Exactly is Headphone Print Damage?
Before we dive into repairs, let's understand what we're dealing with:
Headphone print damage refers to damage to the copper contact pads and traces on the printed circuit board (PCB) that connect the headphone jack to the device's audio output circuitry. These delicate copper pathways can be damaged by:
Physical stress from repeatedly plugging/unplugging headphones
Corrosion from moisture or sweat exposure
Improper cleaning attempts
Manufacturing defects
Age and wear over time
When these prints are damaged, the electrical connection between your headphones and the MP3 player's audio circuit is interrupted, resulting in:
No sound at all
Sound only in one ear
Intermittent sound that cuts in and out
Static or poor audio quality

At Techguru Assam, we teach our students that understanding the "why" behind device failures is just as important as knowing how to fix them. This foundation is what separates true repair professionals from those who just follow steps without understanding.
Tools and Materials You'll Need
Before starting any repair, gather these essential tools. These are the same tools we provide to our students in our training workshops at Techguru Assam:

Basic Tools:
Repair Materials:
Conductive ink pen (silver or copper)
Small gauge wire (30 AWG or thinner)
Soldering iron (fine tip, 15-25W)
Rosin core solder (thin diameter)
Flux pen
Kapton tape or electrical tape
Multimeter (for testing)
Safety Equipment:
Safety glasses
Anti-static wrist strap
Well-lit workspace
Ventilation (if soldering)
In our courses at Techguru Assam, we not only teach students how to use these tools but also how to select quality tools that will last. Many of our graduates have gone on to establish their own successful repair businesses using the knowledge they gained with us.
Step 1: Diagnosis - Confirming Headphone Print Damage
Before attempting any repair, you need to confirm that the issue is indeed headphone print damage and not something else. This diagnostic process is something we emphasize heavily in our training at Techguru Assam.
Visual Inspection:
Open the device carefully:
Remove any screws holding the case together
Use plastic pry tools to gently separate the halves
Take photos during disassembly for reassembly reference
Examine the headphone jack area:
Look for visible damage to copper pads around the jack
Check for green/white corrosion (oxidation)
Look for lifted or peeled copper traces
Inspect for physical cracks in the PCB
Common damage indicators:
Pads that appear "burned" or discolored
Copper traces that are peeled up from the board
Pads that are completely missing
Corrosion around the jack mounting points
Testing with a Multimeter:
Continuity test:
Set multimeter to continuity mode (beep setting)
Touch one probe to the headphone jack contact
Touch the other probe to the corresponding circuit trace
No beep indicates a broken connection
Resistance test:
Set multimeter to ohms setting
Test between jack contacts and known good ground points
High or infinite resistance suggests damage
These diagnostic skills are fundamental to what we teach at Techguru Assam. Our students spend hours practicing on various devices before moving on to actual repairs. This structured approach ensures they develop the confidence to tackle any repair challenge.
Step 2: Cleaning and Preparation
Before attempting repairs, clean the area thoroughly. This step is crucial and often overlooked by beginners, which is why we emphasize it in our courses at Techguru Assam.
Cleaning Process:
Remove debris:
Use compressed air to blow away dust and loose particles
Gently brush with a soft, dry toothbrush
Clean with isopropyl alcohol:
Dampen a cotton swab with 90%+ isopropyl alcohol
Gently clean around the headphone jack and damaged areas
Allow to dry completely (5-10 minutes)
Remove oxidation:
For light corrosion, use a pencil eraser (gentle rubbing)
For heavier corrosion, use a small amount of vinegar on a cotton swab, then clean with alcohol
Never use abrasive materials that could further damage the traces
Surface Preparation:
Ensure the repair area is completely clean and dry
Use the magnifying glass to identify the exact repair points
Mark the repair points with a fine-tip marker if needed
In our training at Techguru Assam, we teach students that proper preparation is often the difference between a successful repair and further damaging the device. Rushing this step is a common mistake we help our students avoid.
Step 3: Repair Methods (From Simple to Advanced)

Method 1: Conductive Ink Repair (Best for minor damage)
This is the simplest method and works well for slightly damaged or corroded pads.
Steps:
Shake the conductive ink pen well
Carefully "draw" over the damaged copper traces
Rebuild missing pad areas with multiple thin layers
Allow each layer to dry completely (follow manufacturer's instructions)
Test continuity with a multimeter
Apply a thin layer of nail polish or conformal coating to protect the repair
Pros:
No soldering required
Low risk of further damage
Good for beginners
Cons:
Less durable than solder
May not work for severe damage
Can be expensive for small repairs
Method 2: Wire Jumper Repair (For broken traces)
This method involves bypassing damaged traces with small wires. This is one of the essential skills we teach in our advanced courses at Techguru Assam.
Steps:
Identify where the trace is broken
Scrape away solder mask from both ends of the broken trace
Cut a small piece of wire (slightly longer than the gap)
Tin both ends of the wire with a small amount of solder
Solder one end to the starting point of the trace
Solder the other end to the ending point
Test continuity
Secure with Kapton tape or epoxy
Pros:
Very reliable connection
Can repair larger gaps
Durable repair
Cons:
Requires soldering skills
Risk of damaging nearby components
Can be challenging in tight spaces
Method 3: Pad Reconstruction (For completely missing pads)
When pads are completely missing, you'll need to reconstruct them. This advanced technique is something we cover in detail in our mastery courses at Techguru Assam.
Steps:
Clean the area thoroughly
Use a small piece of copper tape or create a pad with solder
Build up the pad area with multiple small solder applications
Create a connection to the remaining trace using the wire jumper method
Test for continuity and short circuits
Protect with epoxy or conformal coating
Pros:
Can fix completely missing pads
Strong, reliable connection
Professional-quality repair
Cons:
Most difficult method
High skill requirement
Risk of short circuits
Step 4: Testing and Troubleshooting
After completing your repair, thorough testing is crucial. This systematic testing approach is something we drill into our students at Techguru Assam.
Initial Testing:
Continuity check:
Test between the headphone jack and the repaired traces
Ensure no short circuits to adjacent traces or ground
Resistance test:
Check for proper resistance values
Compare with known good connections if possible
Functional Testing:
Audio test:
Reassemble the device partially (just enough to connect headphones)
Play audio and test both channels
Check for any static or distortion
Physical stress test:
Gently wiggle the headphone plug
Ensure the connection remains stable
No intermittent cutting in/out
Common Issues and Solutions:
Problem: No sound after repair
Solution:
Check for cold solder joints
Verify continuity with multimeter
Ensure no short circuits
Problem: Sound only in one ear
Solution:
Check the specific channel's repair
Look for partial connections or cold joints
Verify the headphone jack itself isn't damaged
Problem: Intermittent sound
Solution:
Check for loose connections
Ensure the repair is secure and not moving
Look for cracked solder joints
Step 5: Reassembly and Final Checks
Once you're confident the repair is working:
Reassembly:
Clean the interior:
Remove any dust or debris
Ensure no tools or materials are left inside
Carefully reassemble:
Follow your disassembly photos in reverse
Ensure all components are properly seated
Don't force anything - if it doesn't fit, check why
Secure the case:
Replace all screws
Ensure proper alignment
Check that buttons and controls work
Final Testing:
Full functionality test:
Test all buttons and controls
Verify charging works
Test with different headphones
Long-term test:
Use the device for an extended period
Monitor for any recurring issues
Check battery life (repairs shouldn't affect this)
Prevention Tips for the Future
To avoid headphone print damage in the future:
Usage Habits:
Always grip the plug, not the cord, when removing headphones
Avoid yanking or pulling on the headphone cable
Use a right-angle adapter if the jack is in an awkward position
Consider wireless headphones if possible
Maintenance:
Keep the device dry and clean
Use compressed air to clean the jack periodically
Avoid using headphones with damaged plugs
Store in a protective case when not in use
Environmental Protection:
Keep away from moisture and extreme temperatures
Use in dry environments when possible
Consider protective cases with port covers
When to Seek Professional Help
While many headphone print repairs can be done at home, some situations require professional assistance:
Seek professional help if:
The damage is extensive (multiple pads/trace damage)
You don't have the necessary tools or skills
The device has other issues besides the headphone jack
You've attempted repair and it's not working
The device is valuable or has sentimental value
Finding a repair technician:
Look for electronics repair shops with good reviews
Check if they specialize in portable audio devices
Ask about their experience with PCB-level repairs
Get a quote before proceeding with repairs
Take Your Repair Skills to the Next Level with Techguru Assam
While this guide provides a solid foundation for repairing headphone print damage, there's so much more to learn in the world of electronics repair. If you found this information valuable and want to turn these skills into a career, I invite you to join us at Techguru Assam.
At Techguru Assam, we offer comprehensive courses that cover everything from basic mobile repairs to advanced chip-level techniques. Our training programs are designed for everyone from complete beginners to those looking to specialize in specific areas.
Why Choose Techguru Assam?
Expert Instructors: Learn from experienced professionals like me who have years of industry experience.
Hands-On Training: We believe in learning by doing. You'll work on real devices with real problems.
Comprehensive Curriculum: Our courses cover mobile phones, laptops, tablets, and more.
Business Skills: We don't just teach repairs; we teach you how to run a successful repair business.
Certification: Earn industry-recognized certificates that validate your skills.
Placement Support: We help our graduates find jobs or start their own businesses.
Our Popular Courses Include:
Smartphone Repairing Course: Master the art of fixing all mobile devices.
Laptop & Desktop Repairing Course: Learn to diagnose and repair computer hardware.
Advanced Mobile Repairing Course: Dive deep into chip-level repairs.
iPhone, Smartphone Repairing Course: Specialize in the most popular devices.
Advance Expert Chip Level Course: Become a true expert in electronics repair.
With flexible course durations ranging from 7 days to 60 days, you can choose the program that fits your schedule and learning goals.
Limited Seats Available!
Our Guwahati batches are filling up fast, with only 6 seats remaining for the August batch. Don't miss this opportunity to transform your future with a career in electronics repair.
Ready to Get Started?
📞 Call/WhatsApp: 96789 28192📍 Visit Us: Techguru Assam, Lakhtokia, Guwahati (Near Hotel Aryan Grand)
Whether you're looking to start a new career, enhance your current skills, or build your own repair business, Techguru Assam is here to help you succeed. Join hundreds of successful graduates who are now earning up to ₹2 lakh per month with the skills they learned with us.
Conclusion
Headphone print damage on your MP3 Shuffle can be frustrating, but it's often repairable with the right approach. By following this guide, you've learned how to diagnose the problem, choose the appropriate repair method, and restore your device to working condition.
Remember to take your time, work carefully, and don't be discouraged if your first attempt isn't perfect. Even I made mistakes when I was starting out! What matters is the willingness to learn and improve.
If you enjoyed this guide and want to learn more about electronics repair, I invite you to join us at Techguru Assam. Our courses are designed to take you from beginner to professional, with hands-on training and personalized guidance every step of the way.
Happy repairing, and may your music play clearly once again!


Comments